The short answer: soil vs. water starting
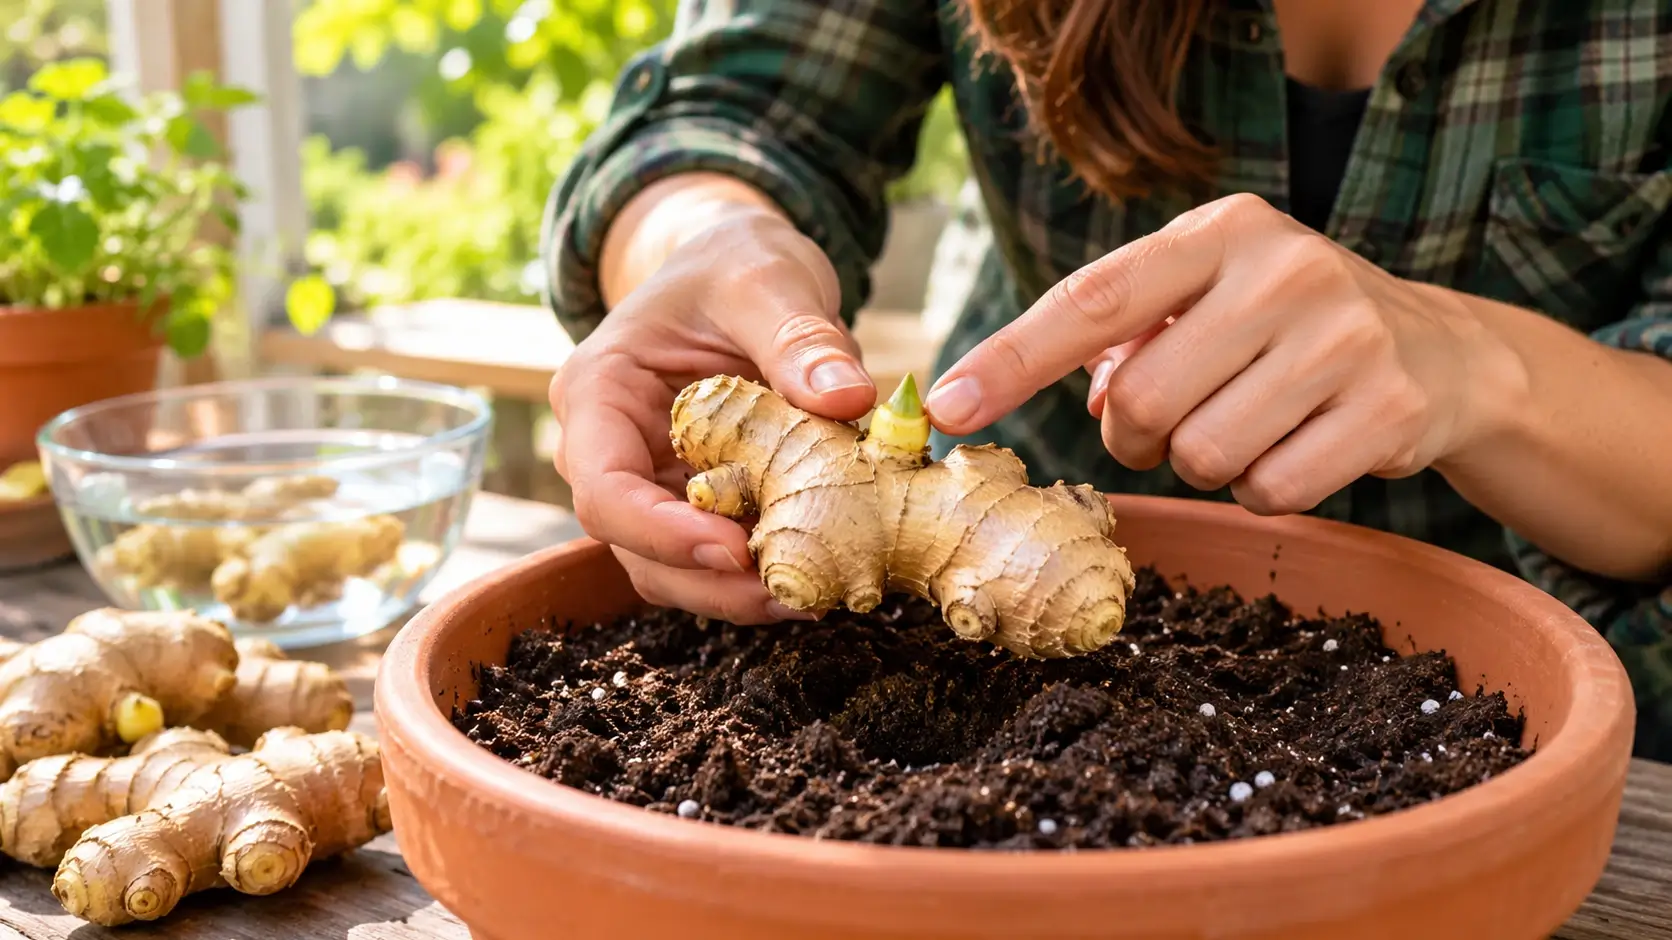
Viable culinary ginger (Zingiber officinale) with firm, unshriveled skin and visible growth buds ("eyes") can sprout and grow in a container. Planting directly into a warm, moist, freely draining potting mix is a well-supported starting method across university Extension guides. You do not have to soak ginger in water for 24 hours to make it sprout, and no controlled trial proves that soaking or water-starting grows ginger faster than planting in warm potting media.
Before you start, keep three botanical and sourcing qualifications in mind: (1) culinary "ginger root" is actually a rhizome—a modified horizontal underground stem, not a true root; (2) grocery-store ginger is sold for cooking, may have been treated with sprout inhibitors, and is not certified disease-free; and (3) an "organic" grocery label does not guarantee a rhizome is untreated for storage or certified free of plant pathogens (University of Illinois Extension, 2023; Penn State Extension).
Store-bought grocery ginger vs. certified disease-free seed rhizomes
University Extension sources take two distinct perspectives on grocery-store ginger depending on whether you are experimenting in an isolated indoor pot or planting into garden soil:
- Container experiments with store-bought ginger: Both University of Georgia Cooperative Extension and Penn State Extension note that home gardeners can start ginger purchased from a grocery store or farmers market by choosing plump, firm, smooth-skinned rhizomes with several visible eye buds (especially buds already showing a hint of green). Penn State notes that organic grocery ginger is often preferred to reduce the likelihood of synthetic growth inhibitors, and UGA suggests washing store-bought rhizomes thoroughly with warm water before planting.
- Why University of Illinois Extension recommends certified seed rhizomes: University of Illinois Extension and its commercial production specialists (Illinois Fruit and Vegetable News, Vol. 29, No. 2) advise buying certified disease-free seed rhizomes from a reputable garden center, seed company, or mail-order nursery rather than the supermarket produce aisle. Culinary ginger may carry soil-borne pathogens—including ginger bacterial wilt (Ralstonia solanacearum race 4), which can survive in soil for up to 40 years—as well as fungal or nematode issues.
- Practical rule for home gardeners: If you use a grocery-store rhizome (conventional or organic), grow it strictly in an isolated container filled with fresh bagged potting mix, and never dump used potting soil from grocery-store ginger into outdoor vegetable beds or compost piles. If you plan to plant in raised beds or garden soil, order certified disease-free seed ginger.
Comparing the three starting approaches: soil, brief pre-soak, and water-only
Social media clips frequently show ginger submerged in jars of water or claim that a 24-hour soak is mandatory to "wake up" the root. Here is how the three approaches actually compare based on horticultural guidance:
| Starting approach | What it involves | Evidence & practical limits | Potential drawbacks & recommendation |
|---|---|---|---|
| 1. Direct planting in warm, moist potting mix (or coir flat) | Select a plump rhizome with raised eye buds (if cut, callus 24–48 hrs in dry air), then set horizontally with buds up in moist, well-drained potting mix or coconut coir kept at 68–86°F. | Directly supported by UIUC Extension and Penn State Extension. Roots establish immediately in an aerated medium without transplant shock from water to soil. | Recommended primary method. Sprouting takes patience (often several weeks); cold or soggy soil below 55°F will rot the rhizome before buds emerge. |
| 2. Optional brief warm-water rinse or pre-soak before potting | Thoroughly washing grocery rhizomes in warm water (UGA Extension) or briefly soaking dry rhizomes in warm water before planting into potting mix. | Can rehydrate slightly dry outer skin and rinse off surface dust, but does not guarantee removal of systemic sprout inhibitors or prove faster sprouting than moist potting mix. | Optional preparation only. Never soak freshly cut pieces (which invites rot into open wounds), and do not soak for days. |
| 3. Water-only sprouting demonstrations (jars / toothpicks) | Suspending or submerging a ginger rhizome in a glass or shallow bowl of water for weeks to watch buds and roots form in open liquid. | Not recommended by university Extension guides for crop production. Ginger rhizomes need oxygen around developing nodes and a wide medium for horizontal expansion. | Not recommended for home growing. High risk of oxygen starvation, bacterial sliminess, and soft rot, plus fragile water-grown roots must still be potted into soil later. |
Rhizome anatomy: why ginger needs width, not a deep narrow pot
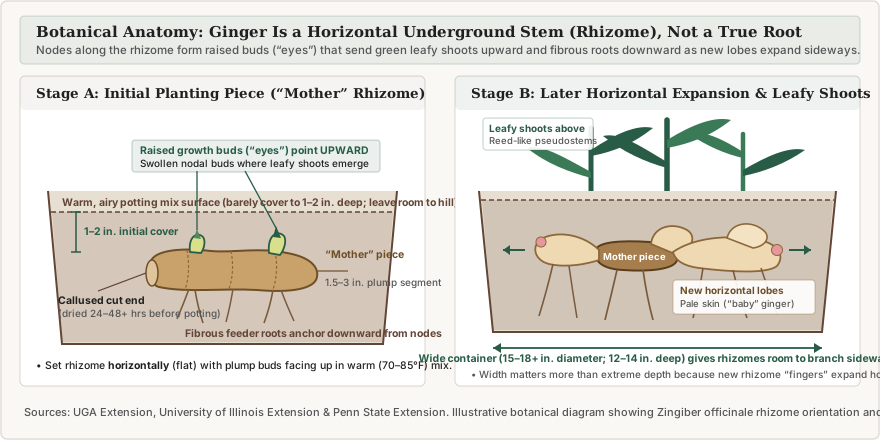
Although grocery stores label it "ginger root," the edible portion of Zingiber officinale is a rhizome—a knobby, horizontal underground stem that stores carbohydrates and nutrients (University of Illinois Extension, 2025). Understanding how that stem grows explains both how to orient it and what kind of pot to choose:
- Growth buds ("eyes") point upward: Raised, rounded nodes along the rhizome fingers are vegetative buds—similar to the eyes on a potato. When warm and moist, these buds send reed-like green leafy pseudostems upward (reaching 2 to 4 feet tall).
- Fibrous true roots grow downward: True feeder and anchor roots emerge from the lower nodes of the rhizome into the potting mix below.
- New rhizome lobes expand horizontally: As the leafy shoots photosynthesize over the summer, new rhizome "hands" branch outward laterally near the soil surface from the original planting piece ("mother" rhizome).
Step-by-step: how to sprout and grow ginger in a container
Notice where Cooperative Extension guides agree—and where their planting depth or pre-sprouting instructions differ based on local climate:
-
1. Choose a plump, firm rhizome with visible "eye" buds
Look for a smooth-skinned, heavy "hand" of ginger with several rounded, pale-yellow or greenish-white growth buds at the tips or nodes (UGA Extension; Penn State Extension). Avoid shriveled, spongy, moldy, or nicked pieces. If you are using store-bought ginger, UGA Extension suggests washing it thoroughly with warm water to rinse off surface residue.
-
2. Cut into 1.5–2 inch pieces (if dividing) and callus for 24–48+ hours
You can plant a small whole rhizome piece as-is, or cut a larger hand with a clean, sanitized knife into 1 to 2 inch (roughly 1 to 3 ounce) sections, making sure each piece has at least one to three prominent eye buds. If you cut the rhizome, do not plant or soak it immediately: place the cut pieces in a warm, dry, well-ventilated room for 48 hours ("a few days" per UGA and Penn State Extension; 48 hours with airflow per UIUC Extension, 2025) until the cut surfaces form a dry protective callus skin.
-
3. Prepare a wide container (14–18+ inches across) with rich, freely draining potting mix
Because ginger rhizomes expand horizontally, container width matters more than extreme depth (Penn State Extension). Choose a pot or breathable grow bag at least 12 inches deep and 15 to 18+ inches wide for 1 to 3 rhizome pieces, allowing roughly 6 to 8 inches between pieces. Fill it with a loose, slightly acidic (pH 5.5–6.5), high-organic-matter potting mix amended with finished compost so water drains freely without waterlogging.
-
4. Plant horizontally with buds pointing up—and note how Extension guides differ on depth and pre-sprouting
Lay each callused rhizome horizontally with the prominent growth buds pointing upward. University Extension sources describe three workable depth and starting variations depending on your climate and setup:
- Barely covered at first with room to "hill" (UIUC Extension News Release): In a 15-inch+ container started indoors in late winter or spring, University of Illinois Extension recommends barely covering the top of the rhizome at first to reduce rot risk, leaving several inches of rim space to add more compost-rich mix as shoots grow.
- 1 to 2 inches deep in containers (Penn State Extension): Penn State Extension recommends planting rhizome pieces 1 to 2 inches deep in a wide container and watering lightly until shoots appear.
- Pre-sprouting in moist coir over a heat mat (UIUC Extension 2025 & IFVN 2023): Short-season northern growers often bury callused pieces in shallow trays of moistened coconut coir or potting mix over a seedling heat mat for 4 to 6 weeks in early spring until 4-to-6-inch shoots emerge and outdoor soil warms above 55°F (UIUC Extension, 2025). In warm southern soils, UGA Extension plants 2 to 4 inches deep.
-
5. Provide steady warmth (68–86°F), bright filtered light, and even moisture
Ginger is a tropical understory plant that thrives between 68°F and 86°F (20–30°C) and stalls or suffers chilling injury when temperatures drop below 50–55°F (UIUC Extension, 2025; Penn State Extension). Keep the pot lightly moist—never soggy—while buds wake up, which often takes several weeks. Once green shoots emerge, increase watering so the mix stays evenly moist, feed monthly with a balanced liquid fertilizer (or mix slow-release fertilizer at planting), and place the container in dappled shade or bright indirect light (2 to 5 hours of gentle morning sun, sheltered from harsh afternoon sun and wind). Add 1 to 2 inches of potting mix or compost around the base of the stems a couple of times during summer ("hilling") to cover exposed rhizomes.
-
6. Harvest tender "baby" ginger (~4+ months) or mature cured ginger (~8–10 months)
How and when you harvest depends on the length of your warm season and how you want to store the rhizomes (UIUC IFVN, 2023; UGA Extension):
- Immature ("baby" or "fresh") ginger (after ~4+ months of active growth, or before fall frost): In most US climates outside USDA Zones 9–12, ginger is harvested in early fall before night temperatures dip below 50–55°F. These young rhizomes have thin, translucent pale-yellow and pink skin that needs no peeling and has fewer tough fibers. Because baby ginger lacks a cured outer skin, it bruises easily and keeps for about 2 to 3 weeks in the refrigerator (or several months tightly wrapped in the freezer). You can also harvest a small side lobe from the edge of the pot and leave the rest of the plant growing indoors.
- Mature ginger (~8 to 10+ months of warm growth): When grown for a full 8 to 10 months (either in frost-free southern climates or by moving the container indoors under bright light as nights cool), the foliage eventually yellows and dies back naturally. Stop watering as leaves dry down, lift the rhizomes, and let the tougher tan outer skin air-dry in a warm, shaded spot for several days. Mature cured ginger stores for 1 to 3 months in cool, dry conditions (around 55°F)—never refrigerate rhizomes you plan to save for replanting.
Ginger Sprouting & Pot-Growing Checklist (PDF)
Includes the rhizome & bud inspection checklist, soil vs. water starting reference table, container width and temperature reminders, baby vs. mature harvest guide, and a write-in pot log. Free direct download—no email required and zero affiliate links inside the PDF.
Frequently asked questions
Can grocery-store ginger really grow into a plant, and do I need to soak it in water first?
Yes, viable culinary ginger (Zingiber officinale) with plump, healthy growth buds can sprout shoots and new underground rhizomes. However, a 24-hour water soak is not universally required, and no controlled trial proves soaking makes ginger grow faster. Planting a healthy (and callused, if cut) piece directly into warm, lightly moist, fast-draining potting mix—with or without a brief wash—is the most reliable home method.
Can I sprout ginger suspended in a glass of water like an avocado pit or sweet potato?
Keeping a ginger rhizome partly submerged in a cup of water is a common classroom or windowsill demonstration, but it is not recommended for growing a productive plant. Unlike true roots or stem cuttings adapted to water rooting, a fleshy ginger rhizome sitting in stagnant or cool water easily runs short of oxygen and rots, and any fragile water roots still must transition into potting mix.
Why do University Extension guides warn against planting grocery-store ginger in garden beds?
Grocery-store ginger is sold as food rather than certified planting stock. University of Illinois Extension notes that culinary ginger may be treated with sprout inhibitors for shelf life and is not inspected or certified free of soil-borne diseases such as ginger bacterial wilt (Ralstonia solanacearum), which can contaminate garden soil for years. If you experiment with store-bought ginger, keep it in an isolated container with fresh potting mix.
Why do Extension guides list different planting depths (from barely covered to 2–4 inches deep)?
Planting depth recommendations vary by climate and starting setup: University of Illinois Extension recommends barely covering the rhizome at first in indoor containers to prevent rot in cooler conditions and hilling more mix as shoots grow; Penn State Extension recommends 1 to 2 inches deep in wide containers; and UGA Extension lists 2 to 4 inches deep for warm southern plantings. In a home pot, 1 to 2 inches deep (with room left to add mix later) is a safe middle ground.
What is the difference between harvesting immature ("baby") ginger and mature ginger?
Immature ("baby" or "fresh") ginger is harvested after about 4 to 6+ months while the green stems are still upright; it has thin pale-cream or pinkish skin that needs no peeling, mild tender flesh, and keeps for about 2 to 4 weeks in the refrigerator (or months in the freezer). Mature ginger requires 8 to 10 months of warm growth until the foliage yellows and dies back, forming the tough tan skin that stores for 1 to 3 months in cool, dry conditions.
The bottom line
Plump store-bought ginger with healthy eye buds can sprout and grow in an isolated container, and you do not need to suspend it in water or rely on a mandatory 24-hour soak. Callus any cuts for 24 to 48 hours, plant the rhizome horizontally in a wide, freely draining container of warm, moist potting mix, keep temperatures between 68°F and 86°F in filtered light, and order certified disease-free seed rhizomes whenever you plan to plant in garden soil.
Sources & University Extension References
- University of Georgia Cooperative Extension (Fulton County) — Growing Ginger and Turmeric at Home
- University of Illinois Extension — How to grow tropical ginger at home for spice
- University of Illinois Extension (Flowers, Fruits, and Frass) — Fresh Ginger Rhizome Cultivation in Illinois
- University of Illinois Extension (Illinois Fruit and Vegetable News, Vol. 29, No. 2) — Growing Ginger in Illinois (Chris Enroth, Feb 2023)
- Penn State Extension (York County Master Gardeners) — Growing Edibles: Ginger